BOMBANANA! Modules
A BOMBANANA! bomb is built from several small puzzle "modules" bolted into the same case, and the game's entire structure hinges on the fact that no single player can read a module and act on it alone. The Mute Monkey's manual describes the correct action, the Deaf Monkey can usually see the module itself, and the Blind Monkey is the only one who can physically press, flip, or turn anything. Reading a module correctly and then getting that reading across the room is most of the game.
BOMBANANA! hasn't fully launched yet — full release is September 2, 2026 — and Lefto Studio hasn't published a complete module roster. What follows is our module list: every type we can confirm from official screenshots and the public demo, described honestly rather than guessed at. We'll split these into dedicated pages once the full game ships with a confirmed module roster and we can verify exact mechanics, edge cases, and naming for each one. Until then, treat this as a working reference rather than a definitive rulebook.
The general solving flow
Almost every module in the demo follows the same basic loop between the three monkeys, regardless of what the module actually looks like. Learning this loop cold is worth more than memorizing any single module, because it's the pattern your team will repeat a dozen times a bomb:
- Name the module. Whoever can see it (usually the Deaf Monkey, sometimes the Blind Monkey by touch) calls out what kind of module it is, in a shared shorthand your team agrees on ahead of time.
- Give its position. Bombs can carry more than one module, so the caller specifies where on the case it sits — left panel, top row, second from the door, whatever landmark your team uses.
- Read the details. The Deaf Monkey describes colors, symbols, or positions to the Mute Monkey through gesture; the Mute Monkey checks that against the manual page for that module.
- Get the manual answer. The Mute Monkey silently signals back the correct action — which button, which switch position, which sequence — without speaking a word of it.
- Repeat it back. The chain relays that answer to the Blind Monkey, usually via the Deaf Monkey narrating what they're seeing the Mute Monkey gesture.
- Confirm, then act. The Blind Monkey states out loud what they're about to do before doing it, giving the sighted teammates one last chance to catch a misread before a wrong press costs time.
That last confirm-before-you-act step is the single habit that separates smooth runs from panicked ones — see our callout guide for a ready-made vocabulary to speed this whole loop up, and our Mute Monkey role page for gesture ideas that don't require speaking.
Diamond / Color Keypad
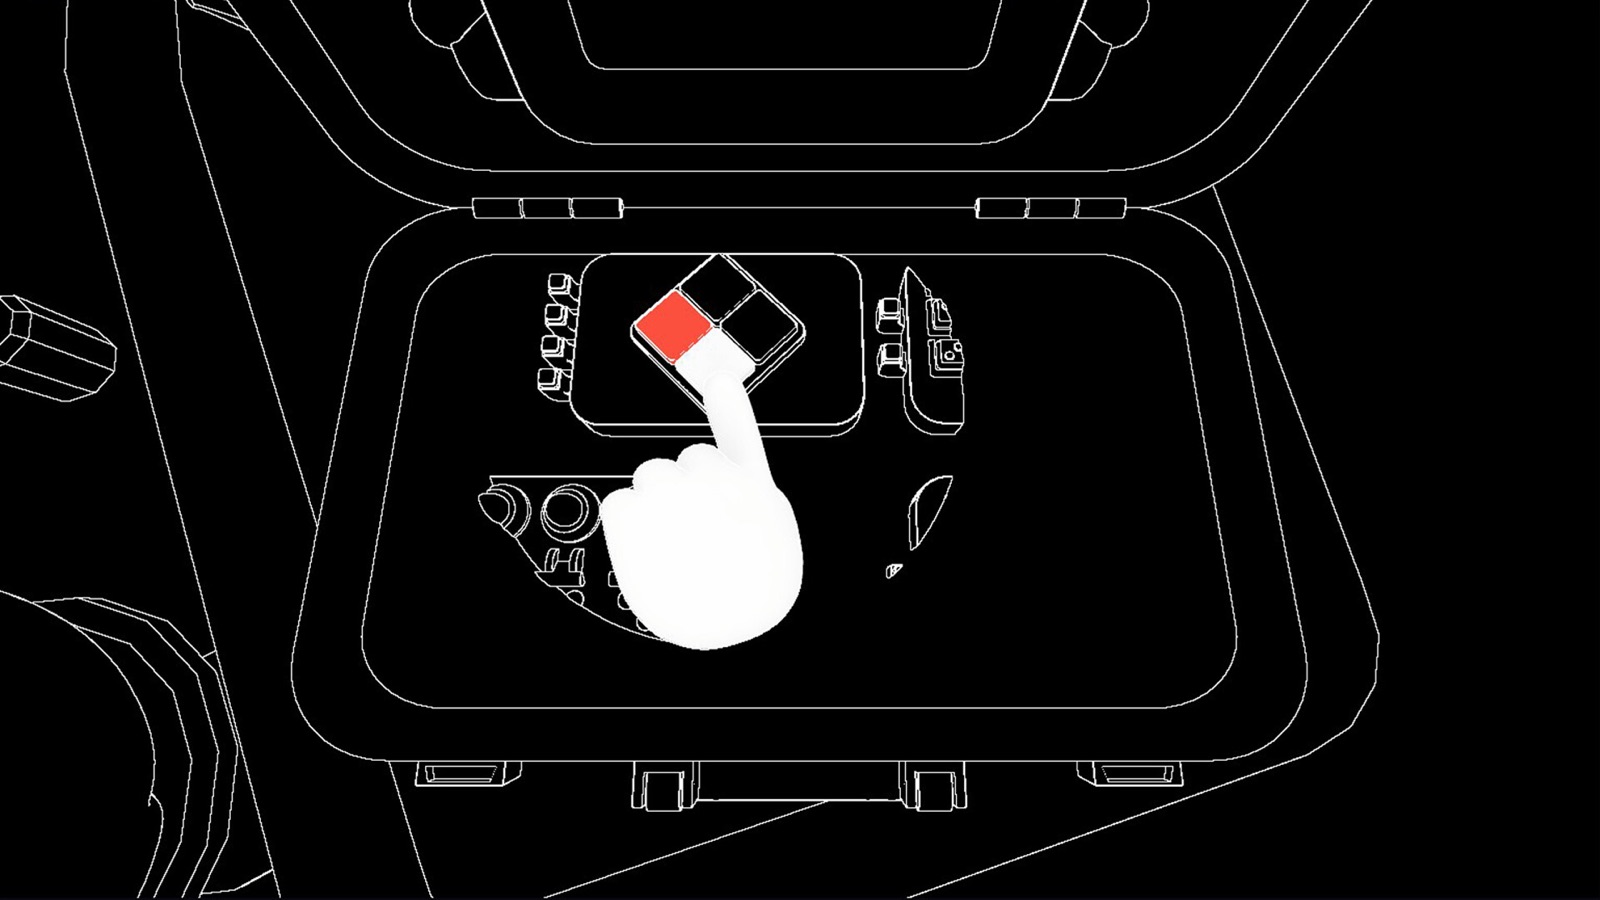
The most common module we've seen across screenshots and the demo is a small keypad of four colored buttons arranged in a diamond rather than a grid — one button at top, bottom, left, and right. The manual instruction identifies a single button by its color, and the Blind Monkey needs to press exactly that one. Because the buttons are arranged by position as well as color, callouts that combine both ("top is red, press top") tend to be faster and less error-prone than color alone, especially once a bomb has multiple keypads on it and positions stop being obvious from touch.
Switch & Slider Bank
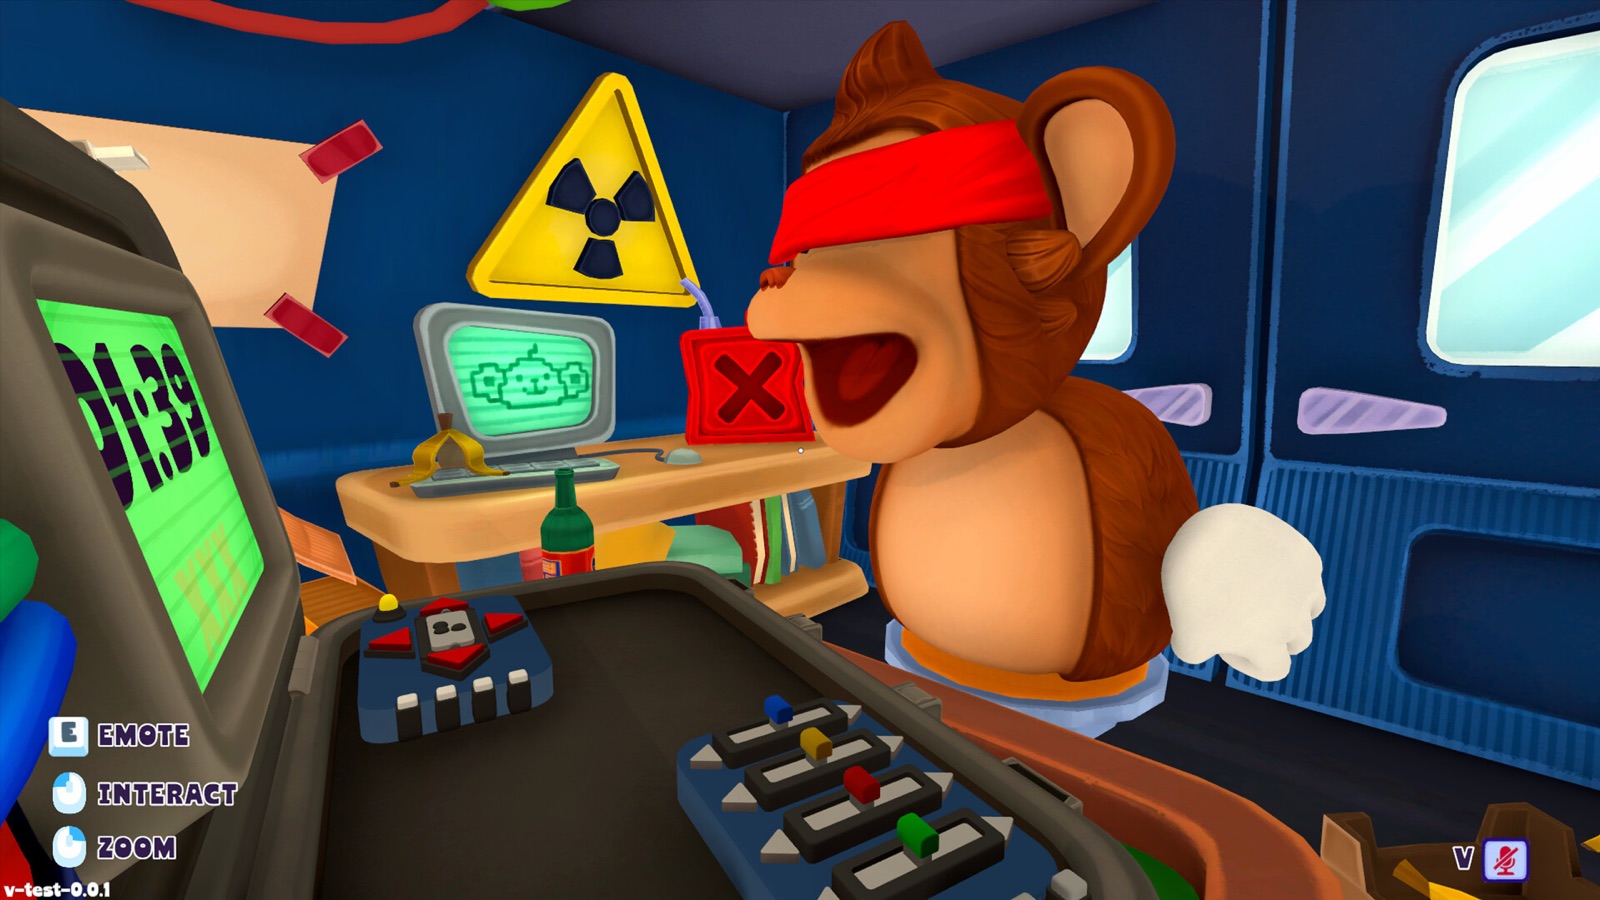
This module is a row of colored sliders or switches, and unlike the keypad it isn't a single press-and-done action — both the color of a given slider and where it currently sits (or needs to end up) matter to the solution. That double condition makes it one of the harder modules to relay verbally, because "move the blue one" is ambiguous if there's more than one blue slider or more than one valid-looking position. Teams that do well on this module tend to agree on a left-to-right numbering scheme for the sliders before touching anything, so a callout can be as unambiguous as "slider two, move it up one notch" instead of a vague color-only instruction.
Directional / Star Keypad
Some bombs pair the diamond color keypad with a second keypad using different symbols entirely — stars, circles, and triangles instead of colors. We've seen this module sitting alongside the color pad in official screenshots, which suggests bombs can mix multiple keypad types on the same case rather than reusing one keypad shape throughout a run. The solving loop is the same as the diamond keypad — manual identifies the correct symbol, Blind Monkey presses it — but because the symbol set is different from the color pad, a team that only built callout shorthand for colors will stumble the first time this one shows up. Worth agreeing on symbol names (star, circle, triangle) as part of the same callout system you use for colors.
Looped-Tube Module
A colorful module made of looping, interconnected tubes is visible in some official screenshots, but we don't have enough information from screenshots alone to say what it actually does — whether it's a trace-the-path puzzle, a color-matching module, or something else entirely. We're not going to guess at a mechanic just to fill this section out. If you've played the demo and know how it works, or once the full game ships with confirmed mechanics, this section will get a proper writeup; until then, treat it as a module we know exists but can't yet explain.
General tips across all modules
- Agree on a numbering or naming scheme for module positions before the timer starts — "the left one" breaks down fast once a bomb has three modules on it.
- Confirm-before-act (say what you're about to press, out loud, before pressing it) catches the majority of misreads with almost no time cost.
- The demo's Free Mode, unlocked after level 5, is a low-stakes way to drill module callouts without a run-ending timer — see our demo levels breakdown for details.
For a broader strategy layer beyond individual modules — team communication systems, role rotation, and staying calm under the clock — see our tips and tricks guide.